The Fractal Era (Fractal Design Era ITX) was released in early 2020 and, although despite attracting a mixture of praise and criticism, it was a case that I quite was interested in. With a standard internal layout in a reasonably small format, it provides the ability to house full ATX-sized power supply, and looks different on the outside. Video reviews all featured the case with a nice looking wooden panel. In mid-2020, these were selling retail for around $270.00 but could be found for as low as $200.
The requirements
I wanted to build my PC in this case. Despite criticisms, I liked the compact aesthetic, especially the lack of tempered glass. Specifically:
- It should be flexible enough to fit a 240mm AIO, ATX-sized PSU and air-cooled graphics card (despite officially not supporting this configuration)
- Graphics card cooling was not going to be good, but acceptable
- A “pull” airflow solution was probably going to be best
- The wooden top panel could be used, it would be a slight compromise on temps, but obviously would look great
Card fitment was considered but it looks like it would fit most things. Besides, we have a decent inventory of mini-sized graphics card to choose from. I wanted to be able to game at 1440p and play MS Flight Simulator at 4K on this computer. It would be a lounge room gaming machine so ideally it needed to be as quiet as possible.
Arrival and initial disappointment
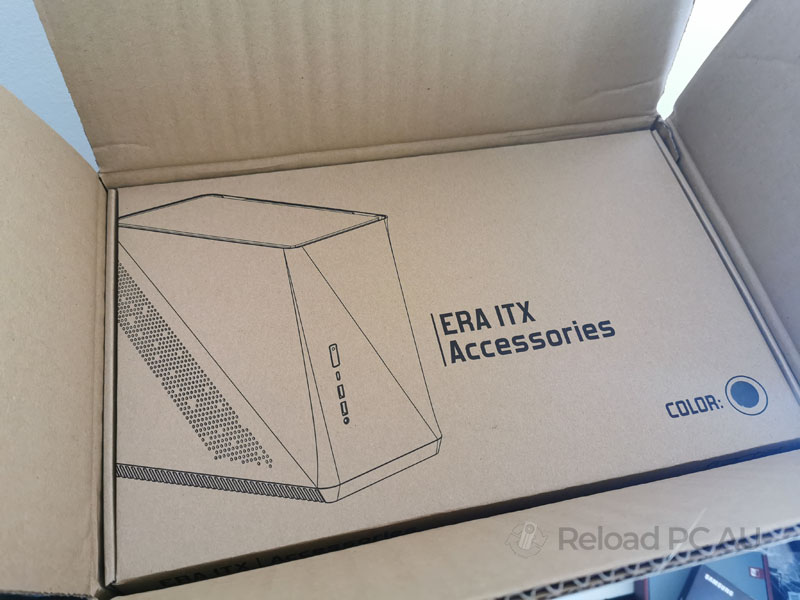
The specific model that was ordered was “Fractal Design Era Mini ITX Carbon TG” (“Carbon” being a fancy name for black).
The first thing I looked for was the wooden panel. There was none… this one came with a black tempered glass panel. What went wrong? Well, upon closer inspection (reading the fine print!), there were only two colours that came with a wooden top panel. Otherwise, the black, blue and champagne coloured versions do NOT come with this wooden top panel.
🔥 Tip: Only two “colours” of the Fractal Era come with a wooden top panel. You must get the silver or titanium coloured ones.
And in general, the silver and titanium colours were long gone - sold out, and it the boring black, blue and champagne that the retailers were still trying to get rid of.
The “Carbon TG” version’s black tempered glass panel was nice, but nothing special. In 2020, the majority of cases already feature darkened tempered glass. It’s safe to say I was not excited at all by the Carbon TG. I immediately put the the TG top panel away, and installed the mesh top panel for airflow and performance.
Phase 1: The first build iteration
First round parts List
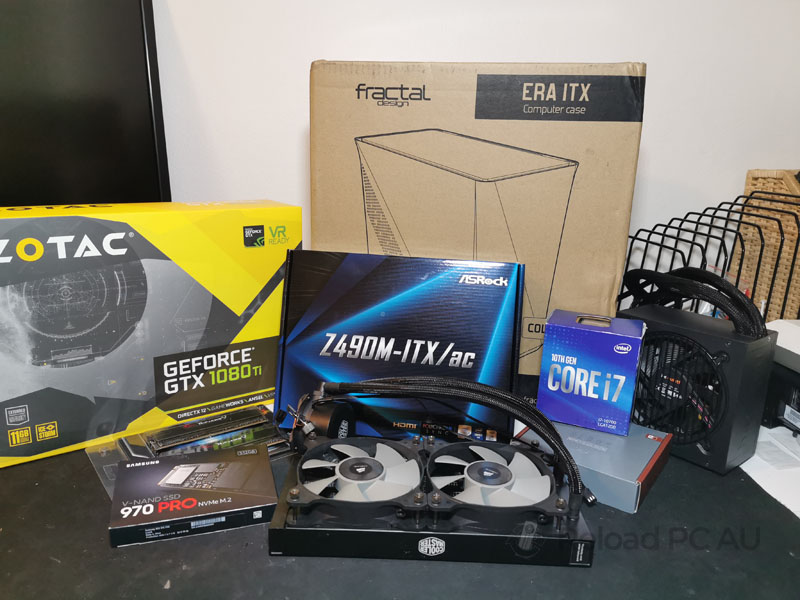
Here was the parts list that I used for the initial build.
| Type | Item |
|---|---|
| CPU | Intel i7-10700 (locked, non-K) |
| RAM | 2x16GB G.Skill Ripjaws V 3200MHz |
| Mobo | Asrock Z490M-ITX |
| GPU | Zotac GeForce GTX 1080Ti mini |
| AIO | Fractal Design Celsius S24 |
| PSU | Be Quiet! Pure Power 11 600W 80+ Gold |
| Drive | 512GB Samsung 970 PRO m.2 NVMe |
Notably:
- An i7-10700 should give us nearly the same power, without the likely very high temperatures of 10700K (assuming that Intel K CPUs were as furnace-like as the i9-9900K)
- Z490 for RAM XMP support, no-brainer
- The Be Quiet! power supply was specifically 150x150mm (L x W) and was non-modular (so it’s an affordable 80+ Gold)
🔥 Tip: ATX-sized PSUs can fit without modding, but you need to find one that’s 150mm or shorter in width.
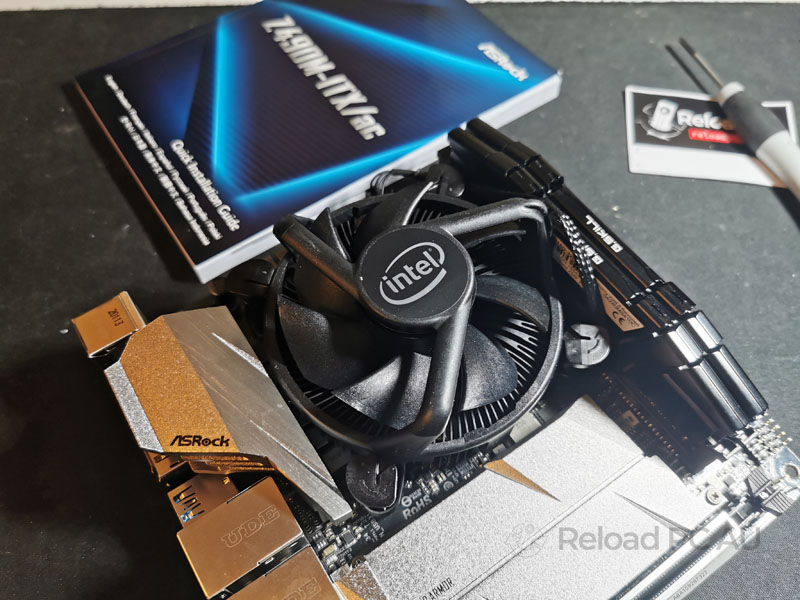
Motherboard
Asrock unashamedly have some of the cheapest motherboards on the market, for both AMD and Intel. Here is a reminder why:
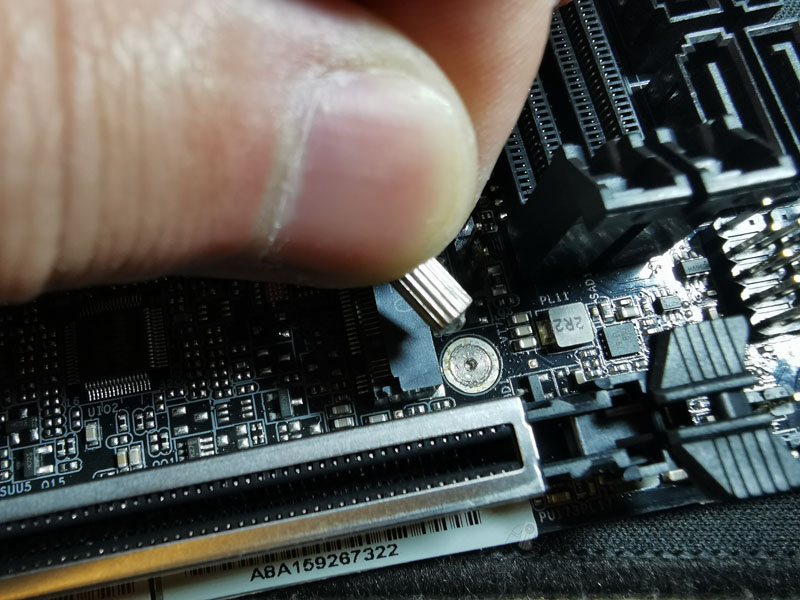
The standoff the for the m.2 heatsink fell off. This needed to be glued back on with JB Weld 😩
First round fitment
The specific order of installation was:
- Have the case lying flat!
- Motherboard (incl CPU, RAM, m.2)
- 240mm AIO Liquid Cooler
- Power supply - route cables, but don’t screw in the bracket yet
- Graphics card
- Now screw in the bracket for the power supply
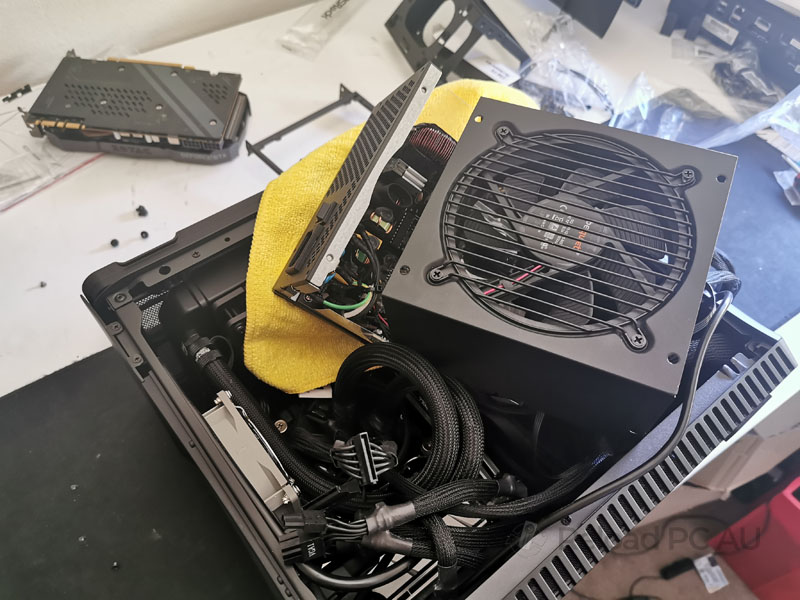
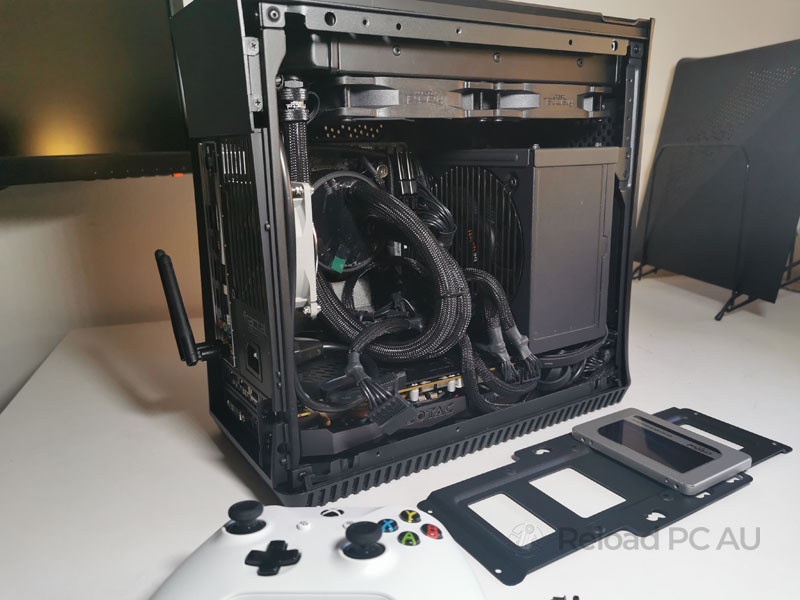
And the assembled machine looked like this:
Testing and issues
Power supply - A tight squeeze.
- With a non-modular ATX PSU, the cables need to go somewhere… so they got tucked in near the bottom/front of the case. It was lucky that the Zotac GeForce 1080 Ti was mini, otherwise this would not have worked.
- The GPU’s PCIe power cables (2x 8-pin) stuck out horizontally, enough to prevent the side panel from closing easily. This is also partly due to the graphics card being wide. The side panel could be jammed in forcibly, but, I would discover later this actually damages the case.
- The manual recommends that the PSU bracket for ATX-sized PSUs should be mounted in the topmost position, but I couldn’t do this due to the 240mm AIO. Furthermore, the top of the PSU needs to fit a 90-degree kettle plug, hence taking up a bit more room. Therefore, the only possible position for the ATX PSU bracket was the bottom-most set of holes.
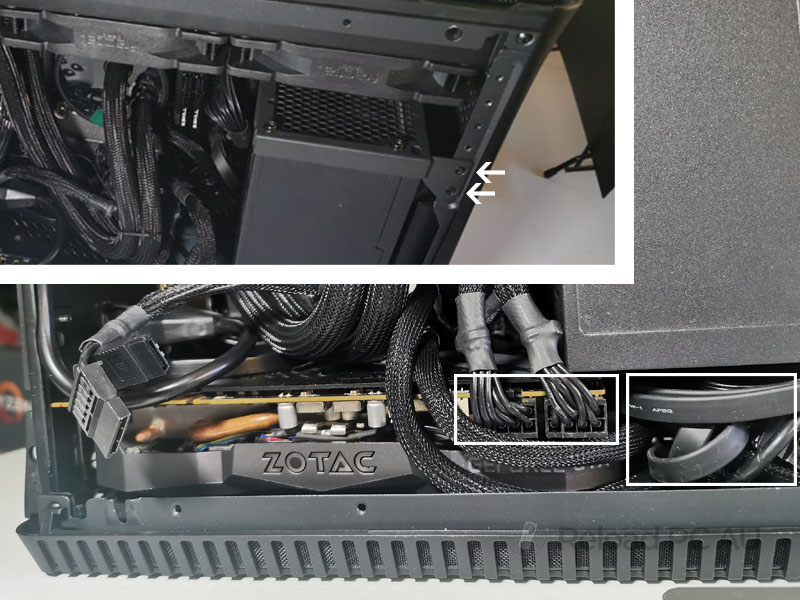
AIO - long cables It also does not help that the AIO’s cables are really long, and these therefore needed to loop around. They needed to be cable-tied in order to be positioned neatly. Certainly not ideal.
So…
It was time to update and upgrade the Fractal Era.
Phase 2: Bröther; may I please have lööp?
Alright, phase 2. A few changes were in order.
Graphics Card
The Zotac 1080 Ti mini needed to go. It was running way too hot, and the only logical solution was a graphics card with a water block. Actually, the Zotac 1080 Ti mini has a pre-waterblocked version called the “ArcticStorm”, but blocks weren’t easy to find.
In the end, I looked elsewhere for a solution. The Asus GeForce GTX 1080 Ti Turbo was another GPU that I had, and was one of the only things that would fit - as well as length of the graphics card, many cards were simply too wide to fit in the Fractal Era. And, a waterblock from Bykski was readily available for the Turbo.
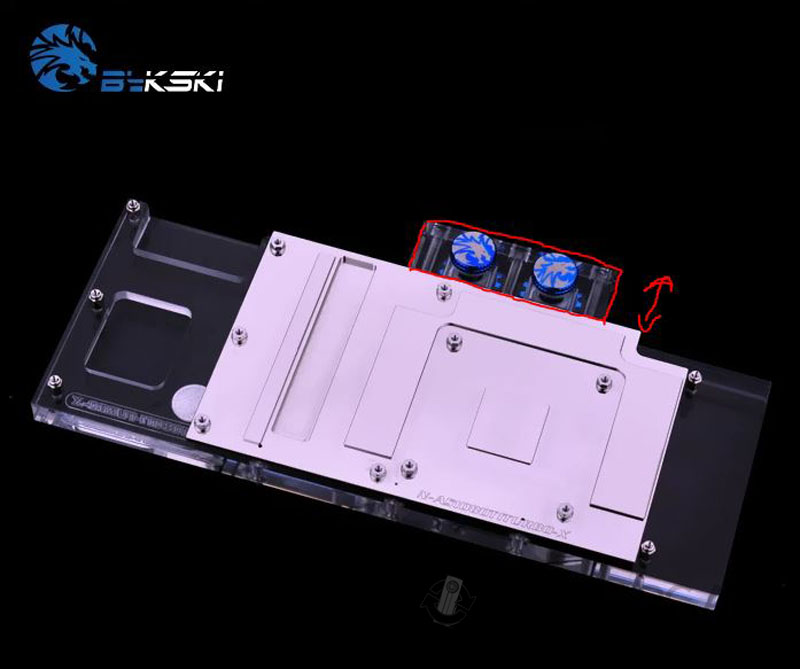
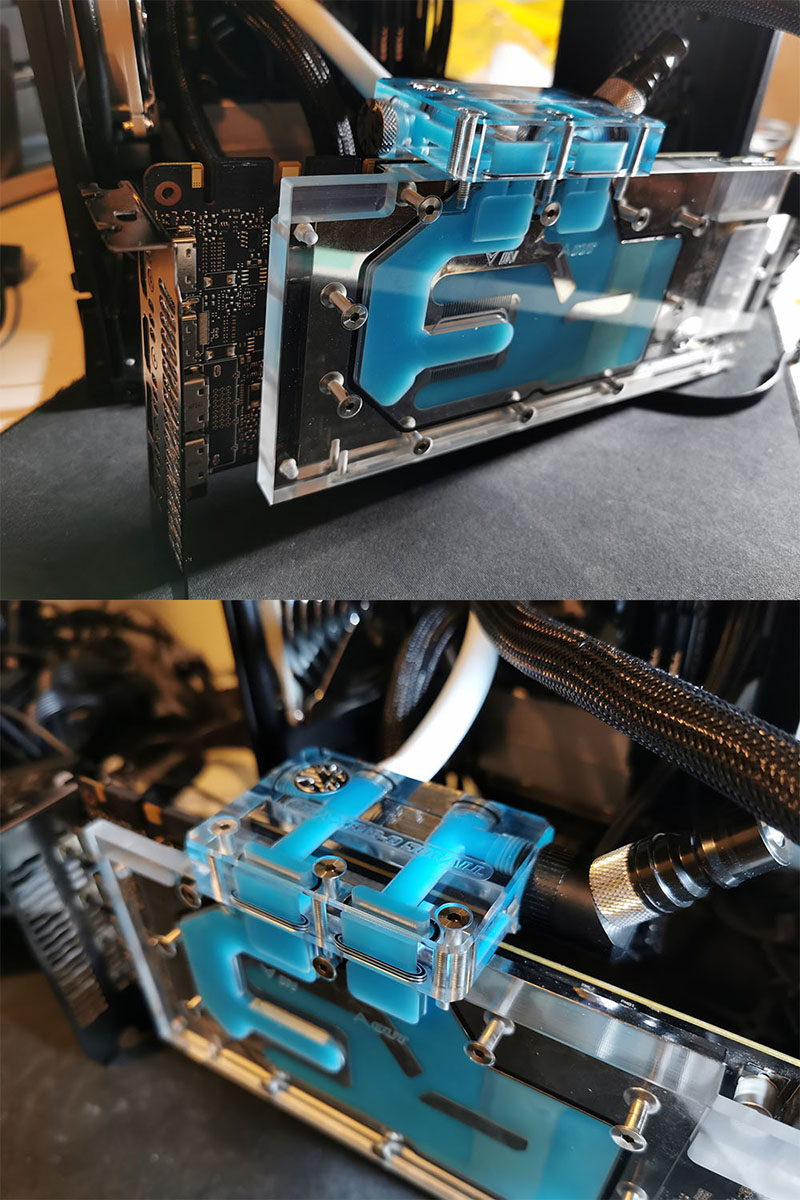
Later on, during installation, I discovered the waterblock’s inlet/outlet ports extended just slightly too far out (circled in red), and prevented the side panel from closing! This was a disappointing outcome after everything else had been carefully measured and fitted. Ultimately, the problem was solved with a Bykski part, a narrower inlet block that protruded outwards much less than the original.
Expandable AIO and a simple custom loop
So, one unique advantage of the Fractal Celsius S24 is the “expandability” of the water-cooling solution. Certainly, Fractal Design heavily markets the fact that you are able to add a waterblock to the loop. Seeing as I had already installed a Celsius S24, it was time to expand it.
🔥 Tip: It’s the Fractal Design Celsius S24, not the S24+, that is expandable. Be careful if you’re looking for this functionality.
Upon opening up the Celsius S24, it became evident that the AIO’s radiator was made of aluminium. One thing that came to mind was problems with mixed metals in water cooling loops. In fact many AIO water coolers have aluminium radiators - and the loop is simply pre-filled with liquid that’s packed with chemicals to prevent corrosion. In my case, I opted to swap for a copper radiator.
Since this water-cooling loop doesn’t contain a reservoir, a quick-disconnect fitting was installed, allowing the loop to be filled up using an external pump and reservoir.
Power Supply
The full-sized ATX power supply was initially really cool. However, there was no way to fit the new GPU (Asus GTX 1080 Ti Turbo) with the full-sized ATX power supply; it would only work with an SFX-sized power supply. Enter the Corsair SF600 80+ Platinum (later upgraded to SF750) - a very well-regarded PSU for small form factor builds.
CPU
The i7-10700 locked CPU worked fine, but during late-2020 sales, the i5-10600KF came in retail at under $300. This was a great price and I grabbed one, in order to take advantage of future overclocking abilities.
The resulting custom loop!
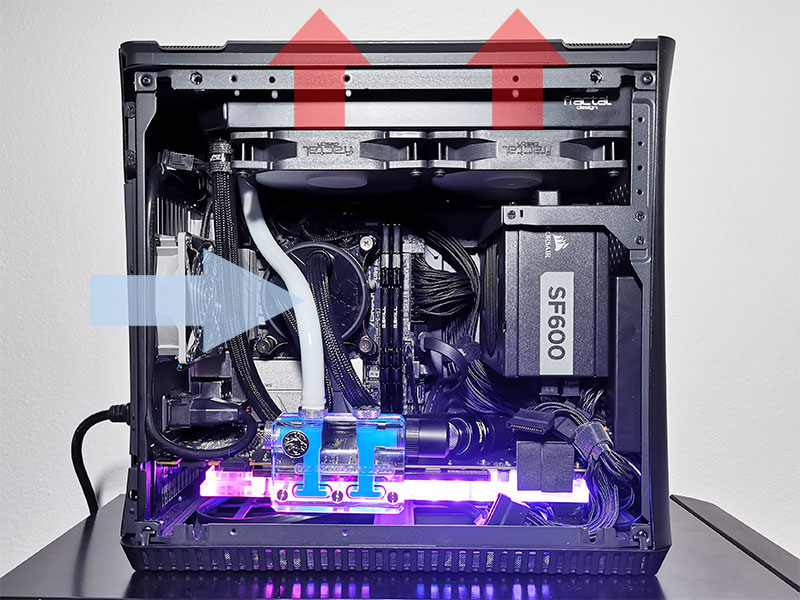
OK - it isn’t the prettiest custom loop ever, but it’ll be concealed behind side panel. There’s enough space within the case, fortunately, to allow airflow to enter from the back and be distributed to both radiator fans.
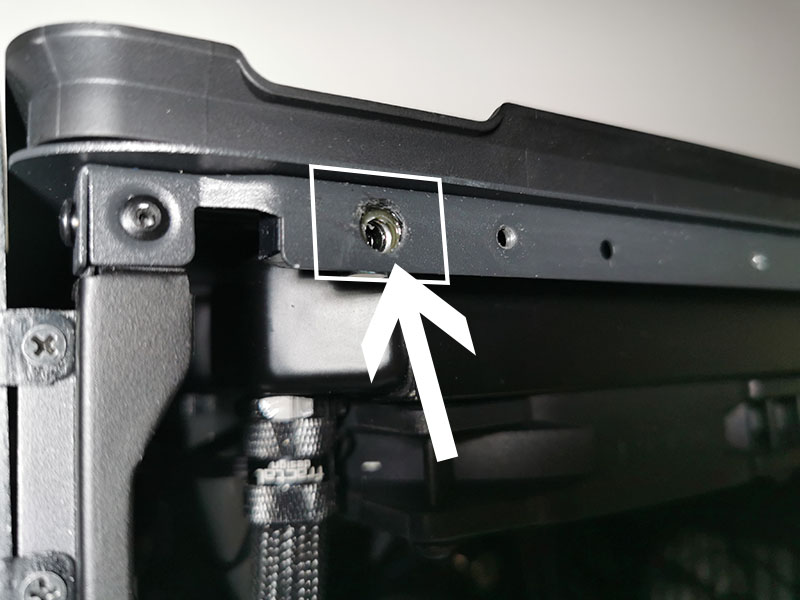
And more problems!
Back to the Fractal Era. The overly-abused side panel ball socket clips gave up and broke. Although the side panel was indeed removed quite a lot, I think these broke much earlier than they should have. This was game-over; the ball socket clips weren’t removable from the case and could not be easily replaced. A less-than-ideal solution was to JB Weld a nut each into the ball socket location, but the side panel did not come off easily any more, requiring significant force to latch and unlatch the case.
❌ Case fail.
Subsequent radiator fan swap
In 2021, I swapped out the stock Fractal Design radiator fans, with ThermalTake ToughFan 12’s. These fans share an extremely similar design to Noctua NF-A12x25’s… but are relatively cheaper. I actually had a bad experience with ThermalTake ToughFans; the first pack-of-two contained one that had unacceptable intermittent rattling. Replacing this “defective” rattling fan with a new one, confirmed that normally the fans aren’t meant to do that. ❌ QA fail. Otherwise, when functioning as intended, the ToughFans have been quiet, reliable and good at moving air through the radiator.
Phase 3: Next generation hardware and upgrades
Overclocking shortcomings
In mid-2021, the price of Z490 ITX motherboards has come down. Although the Asrock Z490M-ITX/AC has been a reasonable motherboard to date, it falls short when it comes to any kind of overclocking. Even though a i5-10600K unlocked CPU is installed, it was never properly taken advantage of for two reasons. Firstly, it was run at stock due to heat concerns - both from a weak VRM setup, and also from requirements for higher Vcore voltages for stability. Secondly - and this was something that was only recently discovered - the Z490M-ITX/AC is hugely power limited! Using Intel Extreme Tuning Utility (XTU), when running a test load, it was hitting the “EDP” limit. Potentially, ThrottleStop could have helped here (I’ve had great results with TS on laptops), but at this stage, swapping the motherboard is probably a better solution.
And the venerable GTX 1080 Ti, as of 2021 being a 4-year-old graphics card, is slowly being made redundant by increased RTX support and new game releases. My original goal of running MSFS did get realised, and progressive game patches improved stability, but at the end of the day, 30-40 FPS still could be better. Flashing an unlocked VBIOS to the card (reaching well over 2GHz core clock!) has also given GTX 1080 Ti an extension on its useful life, but now that high end RTX cards are becoming available…
More to follow