Got a new computer from Reload PC?
Here are some simple steps to set up your computer, as well as some important things to consider.
Step 1: Position your computer
Place your computer in your desired location. It can be on the floor or on a table, either is fine.
- Avoid putting your computer inside a cupboard or small enclosed space - it might overheat!
- Try to avoid dusty areas if possible.
- If you can locate the air intakes on your computer (areas with usually mesh or grille), avoid covering these areas up, and try to place these air intakes away from walls or obstructions.
Step 2: Prepare your monitor’s cables
For your computer monitor, you will need at least two cables:
- A “kettle plug” cable (3-pin IEC) for power
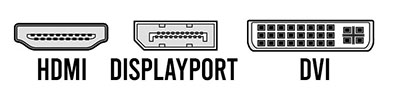
- A supported type of display data cable, either DisplayPort, HDMI, or DVI, depending on what your monitor supports.
Sometimes your monitor might also support extra cables, such as a USB Type-B extension cable, if your monitor has built-in USB ports.
You should now connect these required cables to the bottom or the back of your monitor. Connect the other end of the power cable to your wall socket.
Step 3: Connect your display cable
On the back of your computer, identify the corresponding DisplayPort, HDMI or DVI ports for the display cable from your monitor.
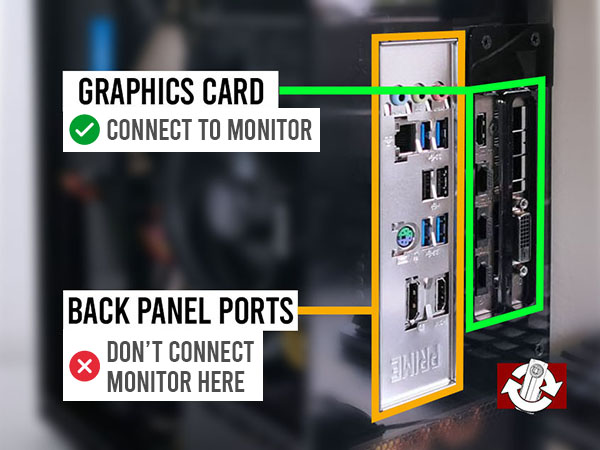
⚠ Important: If your computer has a graphics card – then connect your display cable to the graphics card’s ports, instead of the motherboard back panel. Your graphics card is separate from the rest of the back panel. On your Reload PC product, look for the handy stickers to guide you to the correct ports.
Connect your display cable now. If you have multiple monitors, repeat this process as long as you have spare ports on your computer!
Step 4: Connect your keyboard and mouse
Your keyboard and mouse have USB connectors, that will work. These rectangular connectors (USB Type-A) will plug in to the back panel USB ports of your computer (or also on the front panel if you have any). Connect these now.
If you have speakers, these may use a 3.5mm plug or they may connect with USB. You may also connect these now.
Step 5: Connect the power cable to your computer
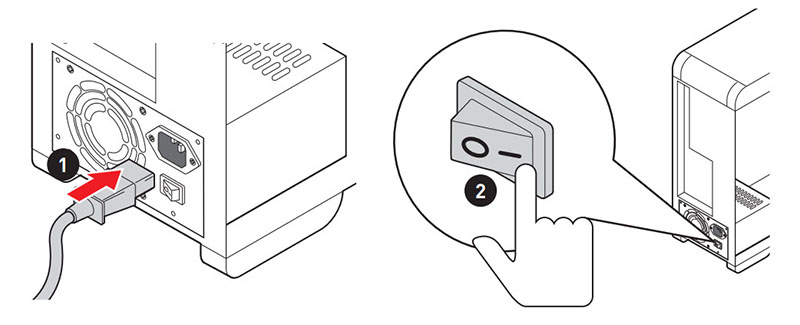
Finally, locate a “kettle plug” power cable (3-pin IEC). Your Reload PC product will have one included.
Connect this to your computer’s power supply unit, usually located on the back of your computer. If your computer has its own power switch, flick this on to “I” for “on” (otherwise it’s “O” for “off”).
You should then connect the other end of the power cable to your wall socket.
Step 6: Start your computer!
Ensure your wall sockets are switched on, then you may press the “Boot” button on your PC. Usually this is located on the front or the top.
Your monitor should activate with a display, and the PC will proceed with its boot sequence.